Viewing Dockets
All Active Dockets and Closed Dockets list every public docket in the system. Open any docket in Docket 360 to see its details, documents, parties, service notifications and comments.
Signed-in Tier 1 and Tier 2 users. To see only the dockets you created or filed into, use My Dockets.
All Active Dockets
-
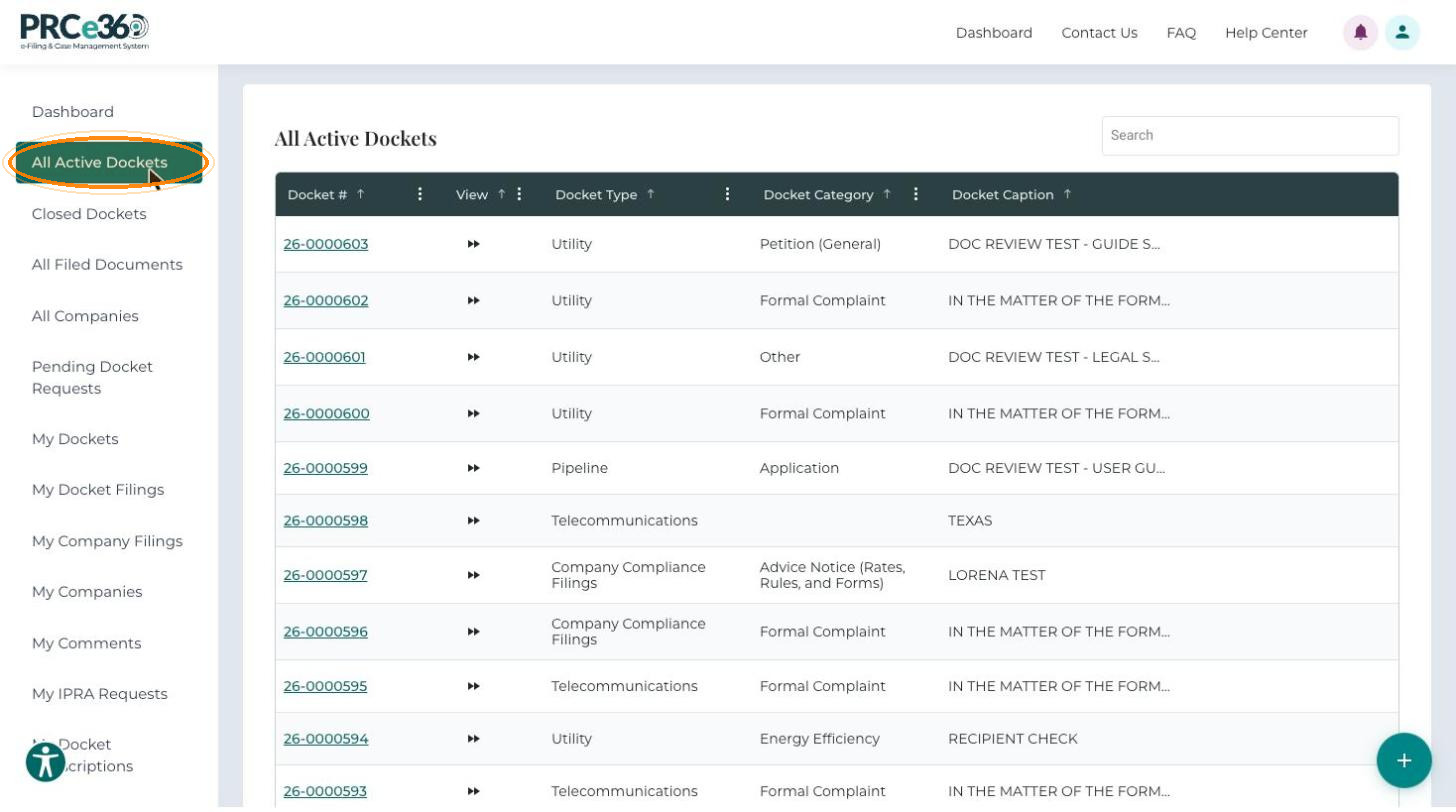
In the left menu, click All Active Dockets. The list of active dockets opens. Each row is one docket.
Columns- Docket #
- View
- Docket Type
- Docket Category
- Docket Caption
-
To narrow the list, type in the Search box or use the column filters.
-
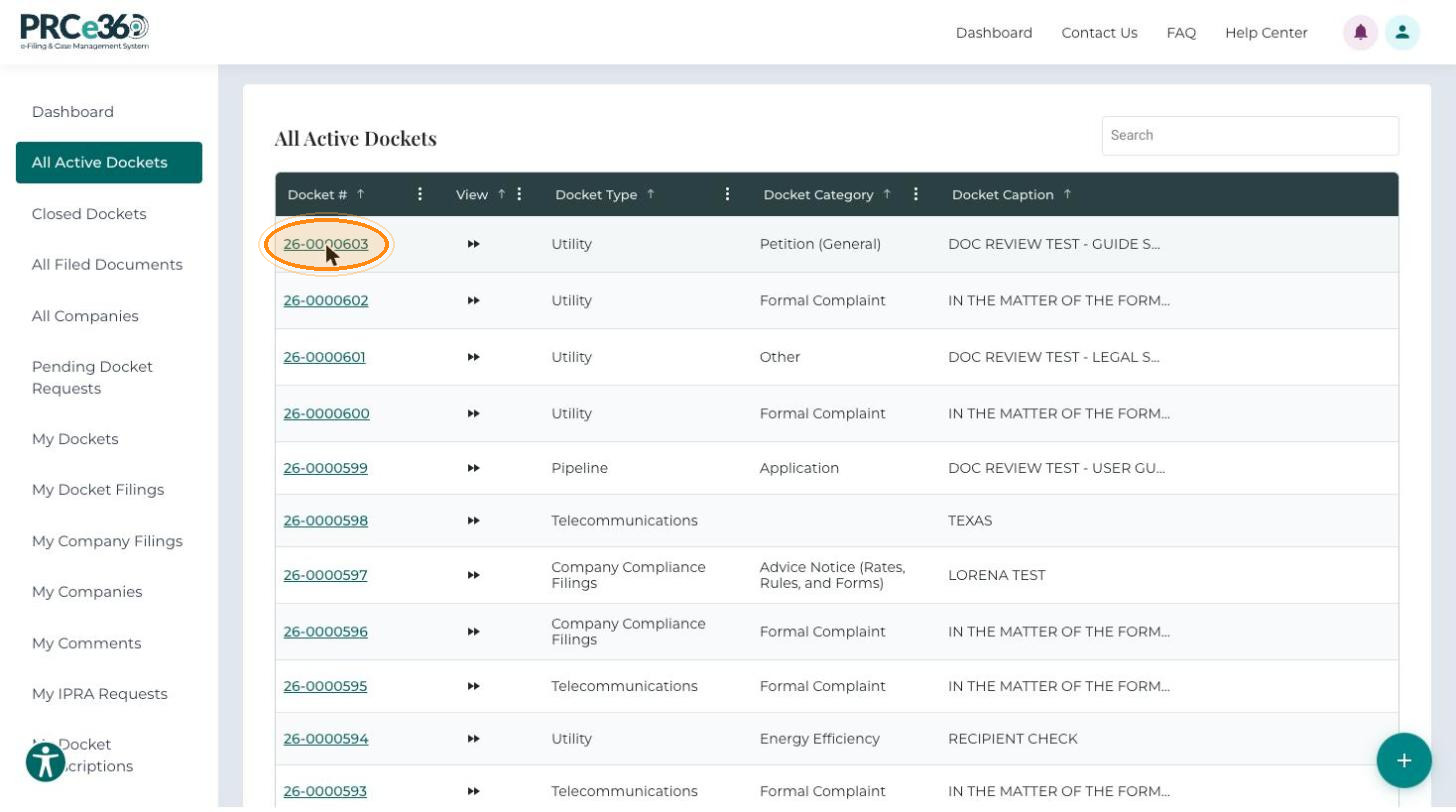
Click a Docket # to open the docket in Docket 360.
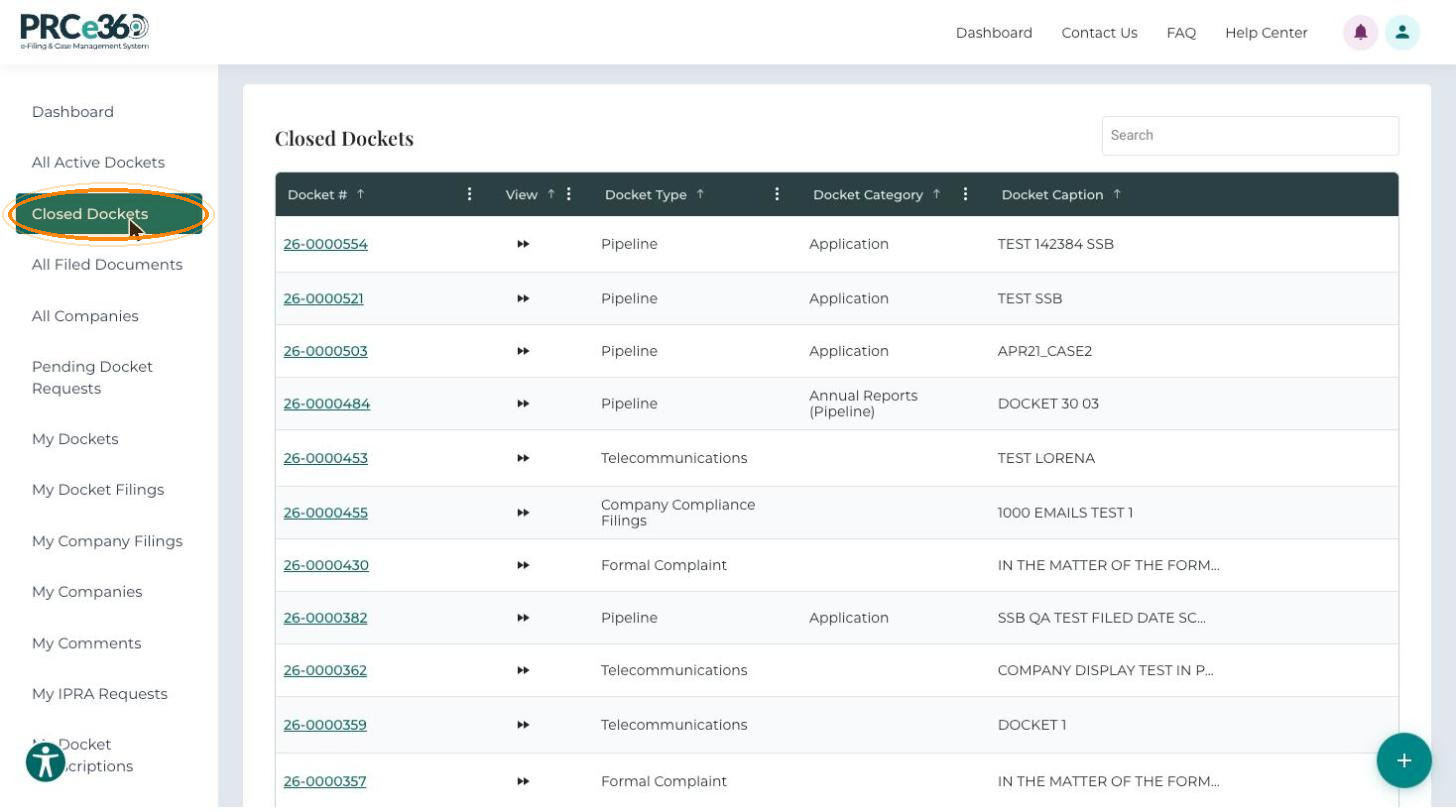
Closed Dockets
Click Closed Dockets in the left menu to list dockets that have been closed. The list has the same columns as All Active Dockets. Click a Docket # to open it in Docket 360; the status shows as Closed.
Docket 360
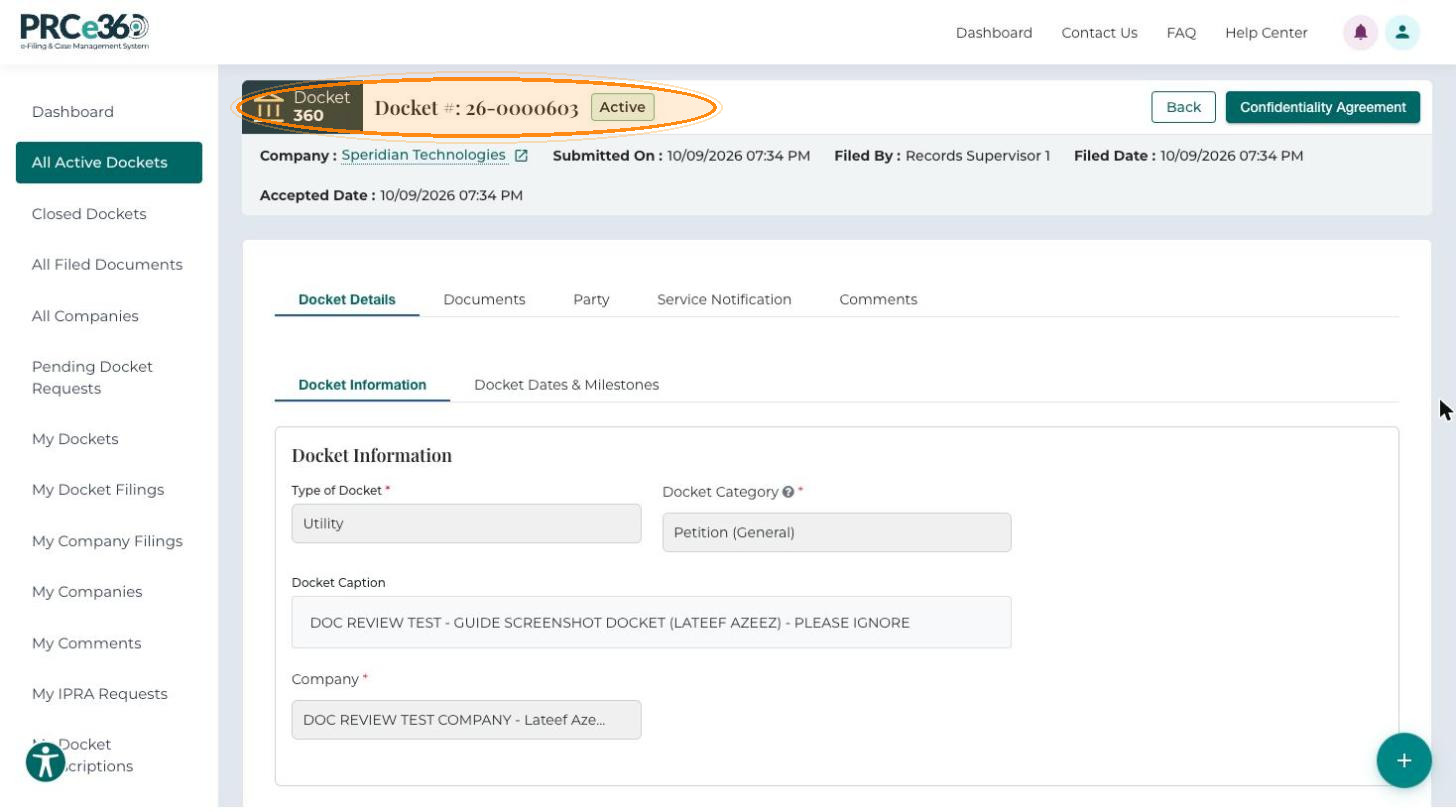
Docket 360 shows the complete information for one docket. The header at the top shows:
| Field | Description |
|---|---|
| Docket # | The official docket number. |
| Status | The current docket status, for example Active or Closed. |
| Company | The company the docket is for. The name links to the company. |
| Submitted On | Date and time the filing was submitted. |
| Filed By | The person who submitted the docket. |
| Filed Date | Date and time the PRC accepted or recorded the filing. |
| Accepted Date | Date and time PRC staff accepted the docket. |
Click Back to return to the list. Below the header are the Docket Details, Documents, Party, Service Notification and Comments tabs.
Docket Details Tab
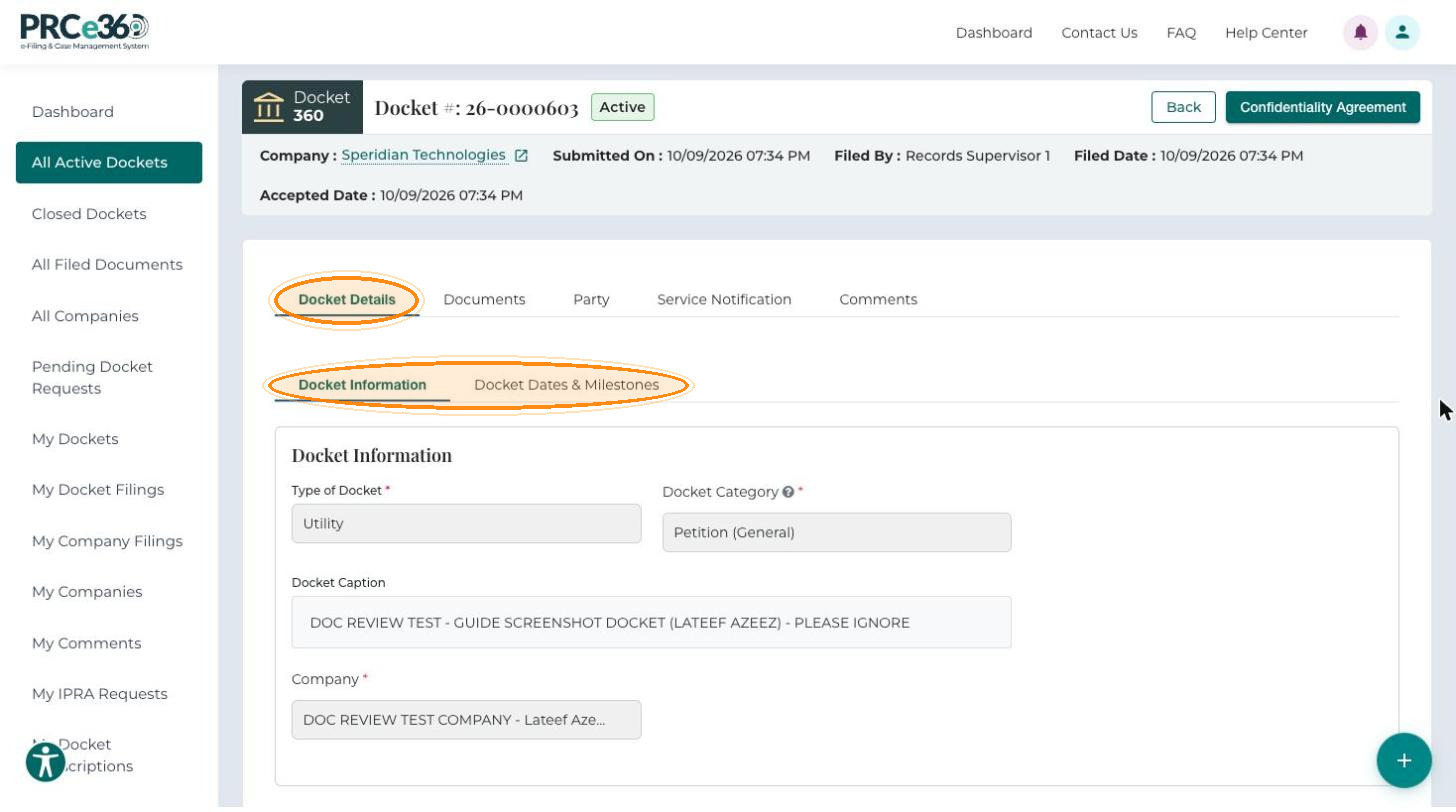
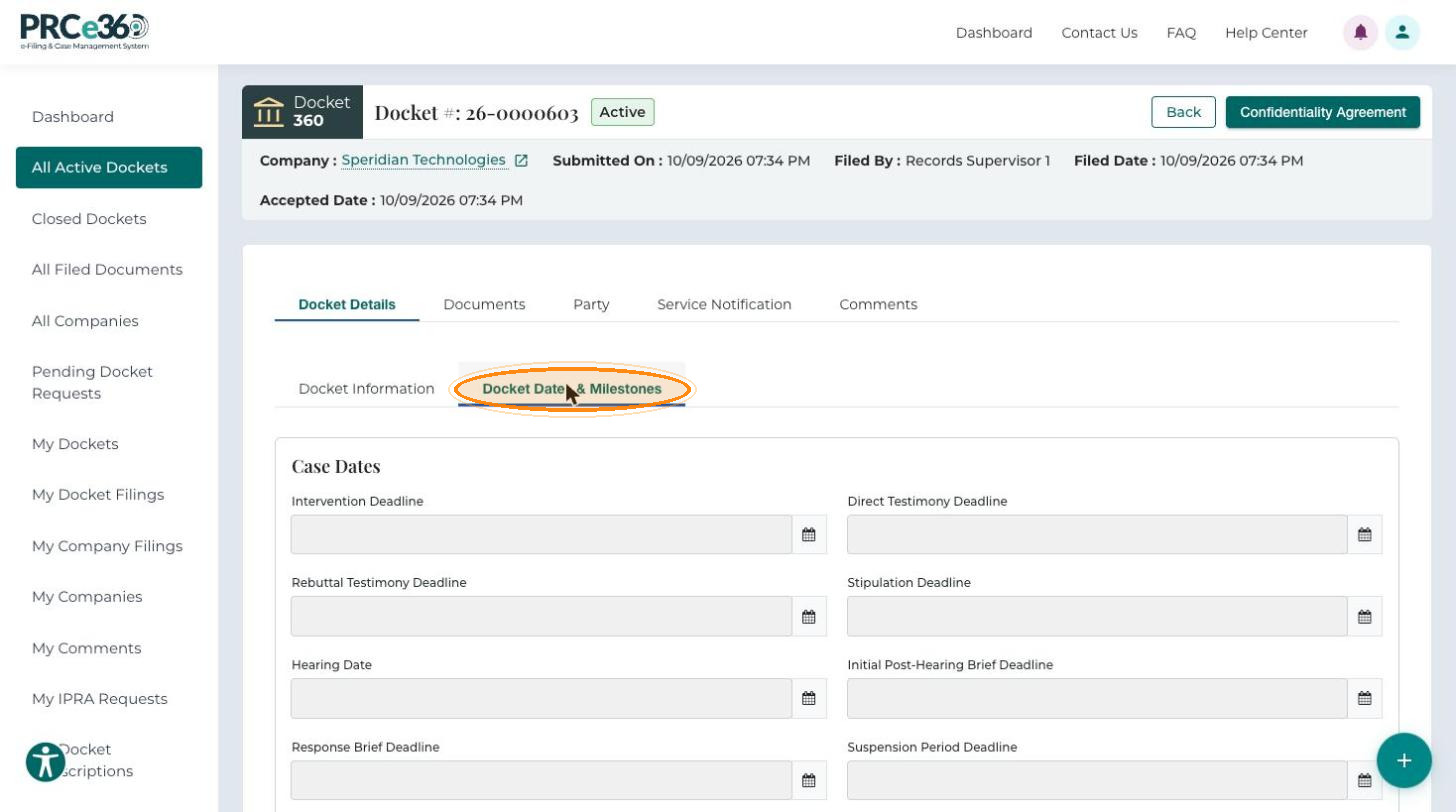
This tab shows, read-only, the form that was submitted when the docket was created. It has two sub-tabs:
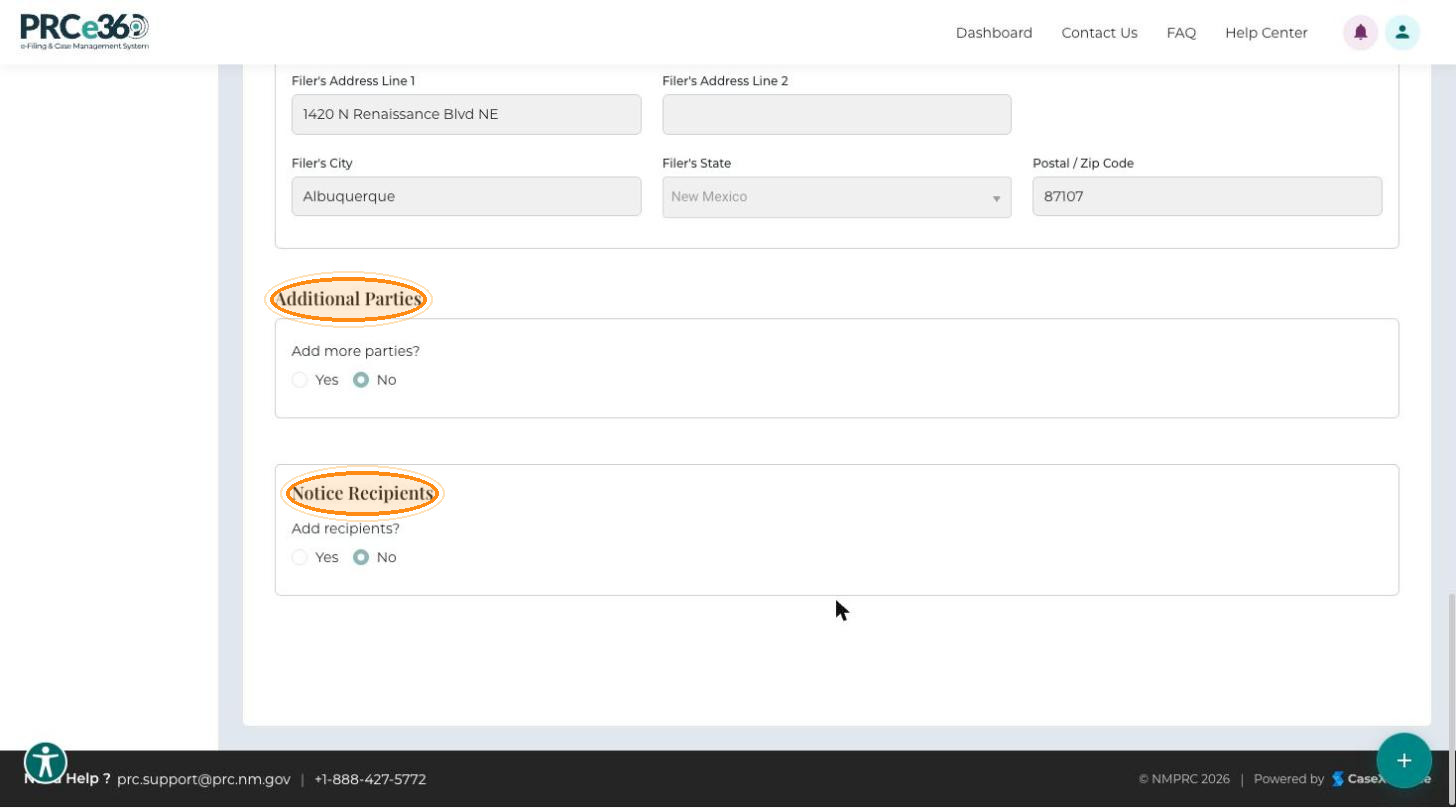
- Docket Information – the docket details and parties:
- Docket Information: Type of Docket, Docket Category and Docket Caption.
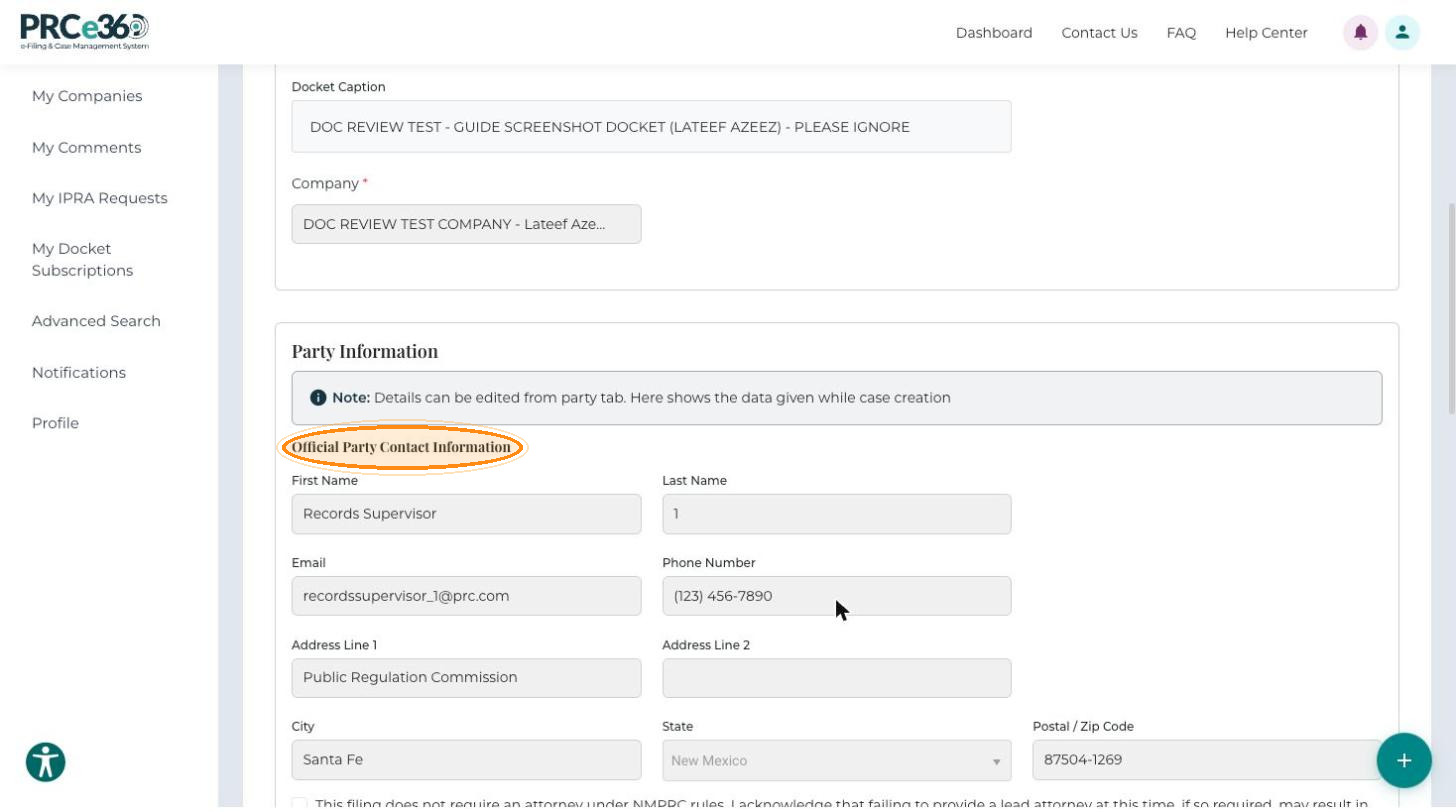
- Party Information: the Company and the Official Party Contact Information.
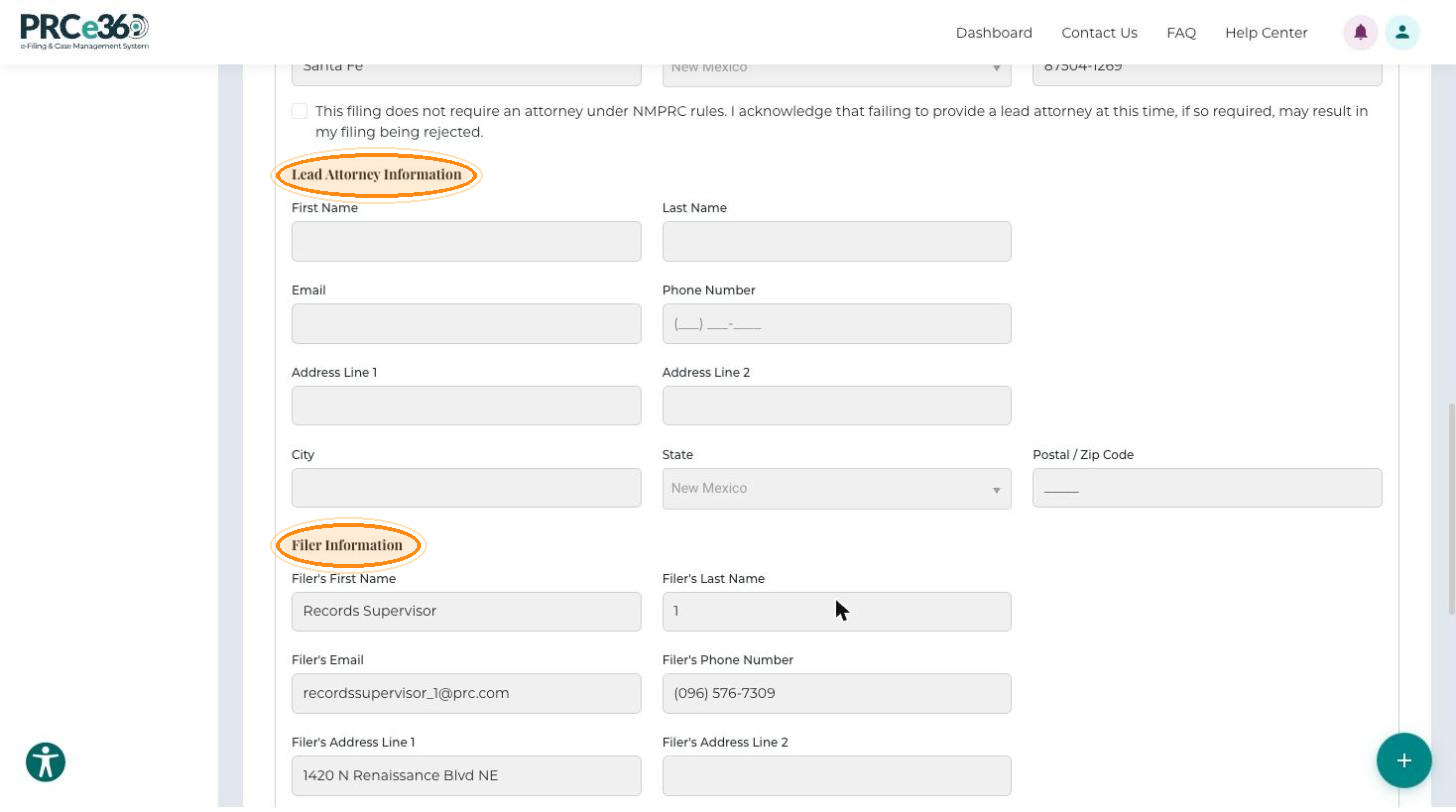
- Lead Attorney Information, or a checked statement that the filing does not require an attorney.
- Filer Information (the filer's own details), or Other Authorized Filer's Information when the docket was filed on behalf of another authorized filer.
- Additional Parties and Notice Recipients.
- Docket Dates & Milestones – the Case Dates for the docket: Intervention Deadline, Direct Testimony Deadline, Rebuttal Testimony Deadline, Stipulation Deadline, Hearing Date, Initial Post-Hearing Brief Deadline, Response Brief Deadline, Suspension Period Deadline and Statutory/Regulatory Deadline.
The Party Information section shows the details given when the docket was created. To change them, use the Party tab.
Documents Tab
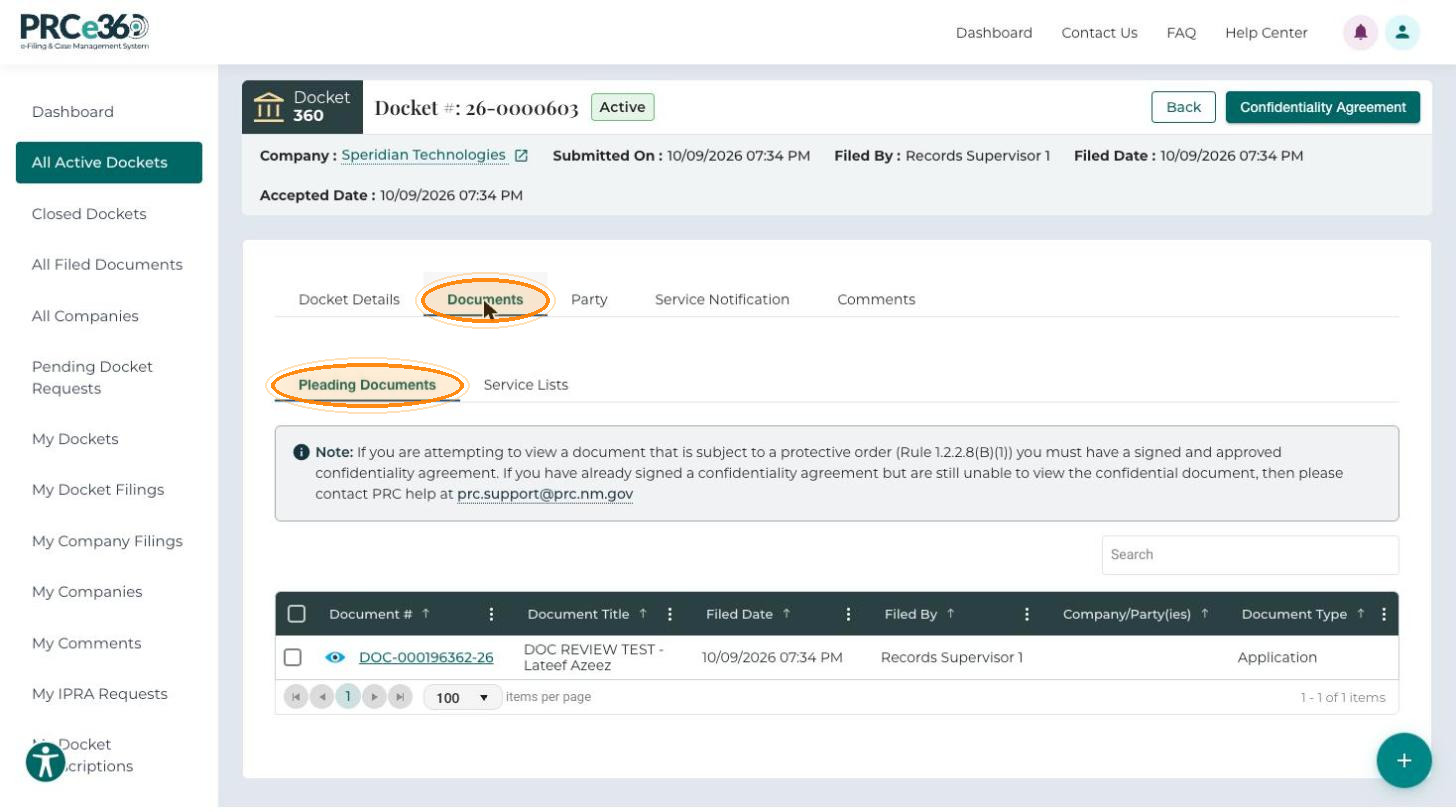
This tab has two sub-tabs: Pleading Documents and Service Lists.
Pleading Documents
This sub-tab lists all documents filed in the docket. Use it to review document details, check confidentiality and download filings.
| Column | Description |
|---|---|
| Document # | Unique document number. Click it to open the document, if it is public. |
| Document Title | The title the filer entered. |
| Filed Date | Date and time the document was officially filed. |
| Filed By | The person who submitted the document. |
| Company/Party(ies) | The company or party the filing is for. |
| Document Type | For example Application, Exhibit or Motion. |
| Document Description | The description the filer entered. |
| Confidential | Whether the filing is confidential (Yes or No). |
| Linked | Whether the document is linked to another filing. |
| Document Role | The document's role in the filing. |
To view a document that is subject to a protective order (Rule 1.2.2.8(B)(1)), you must have a signed and approved confidentiality agreement. If you have signed one and still cannot view the document, contact PRC help at prc.support@prc.nm.gov.
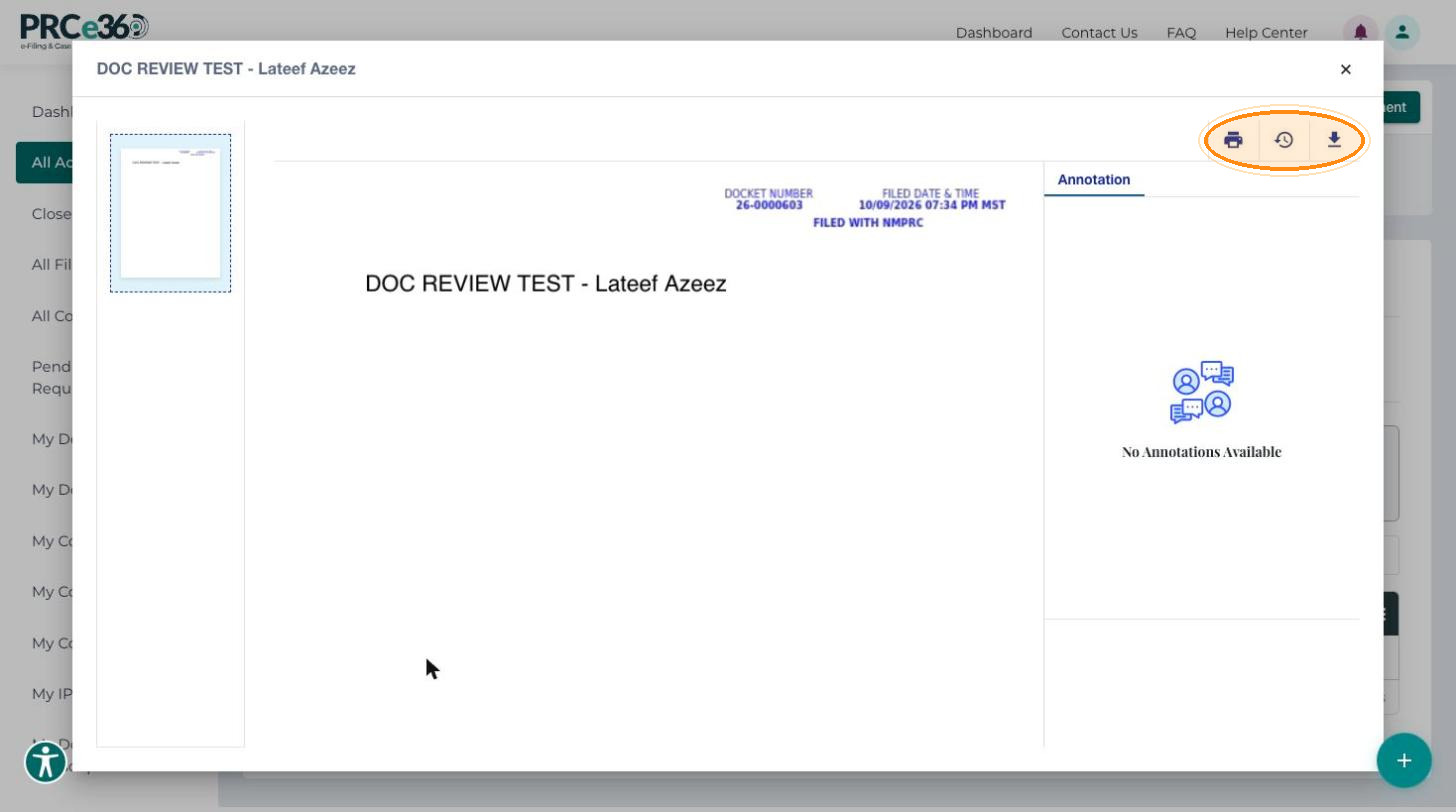
Click a Document # to open the document in the viewer. The viewer has print, history and download buttons and an Annotation panel.
Download Documents
-
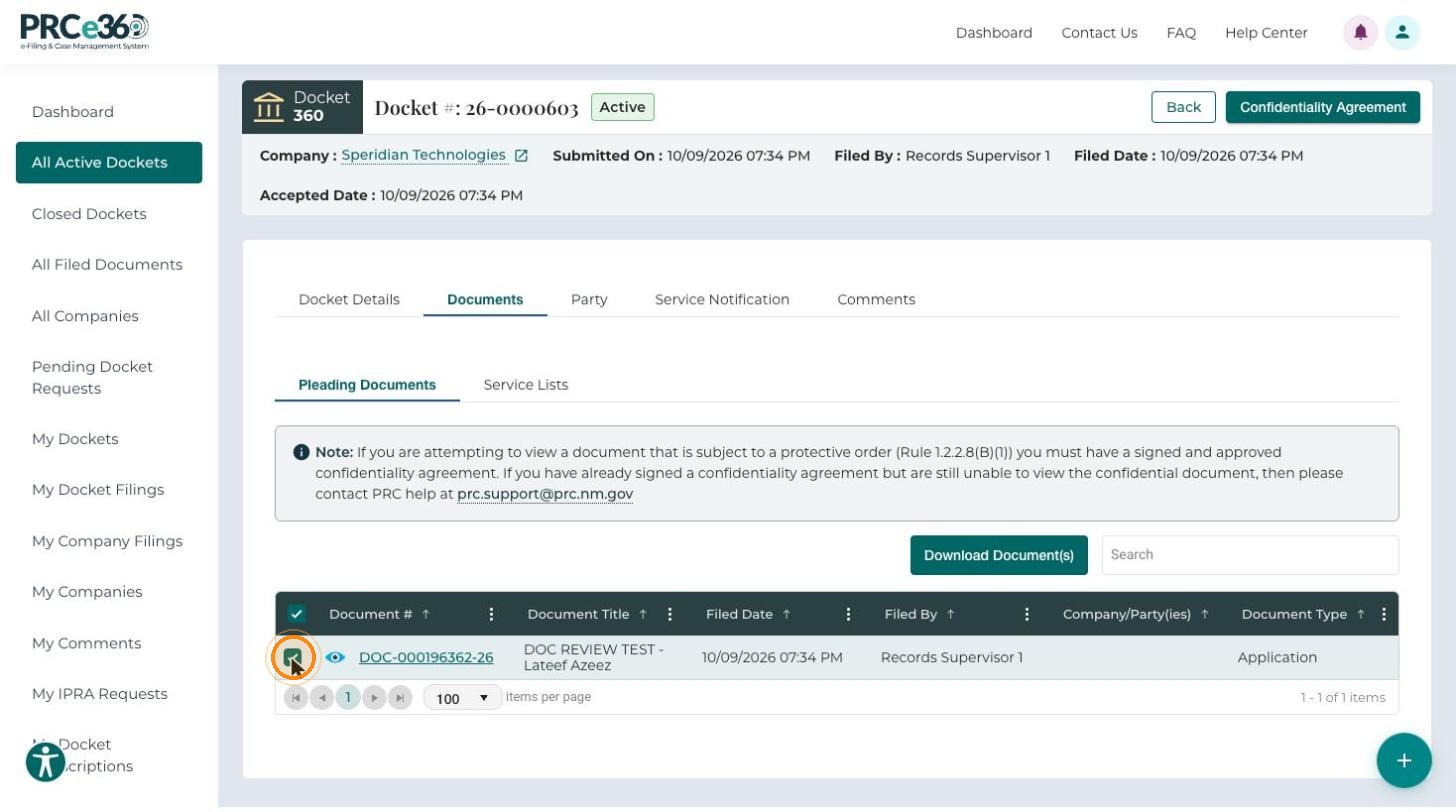
Select the checkbox of one or more documents. The Download Document(s) button appears above the list.
-
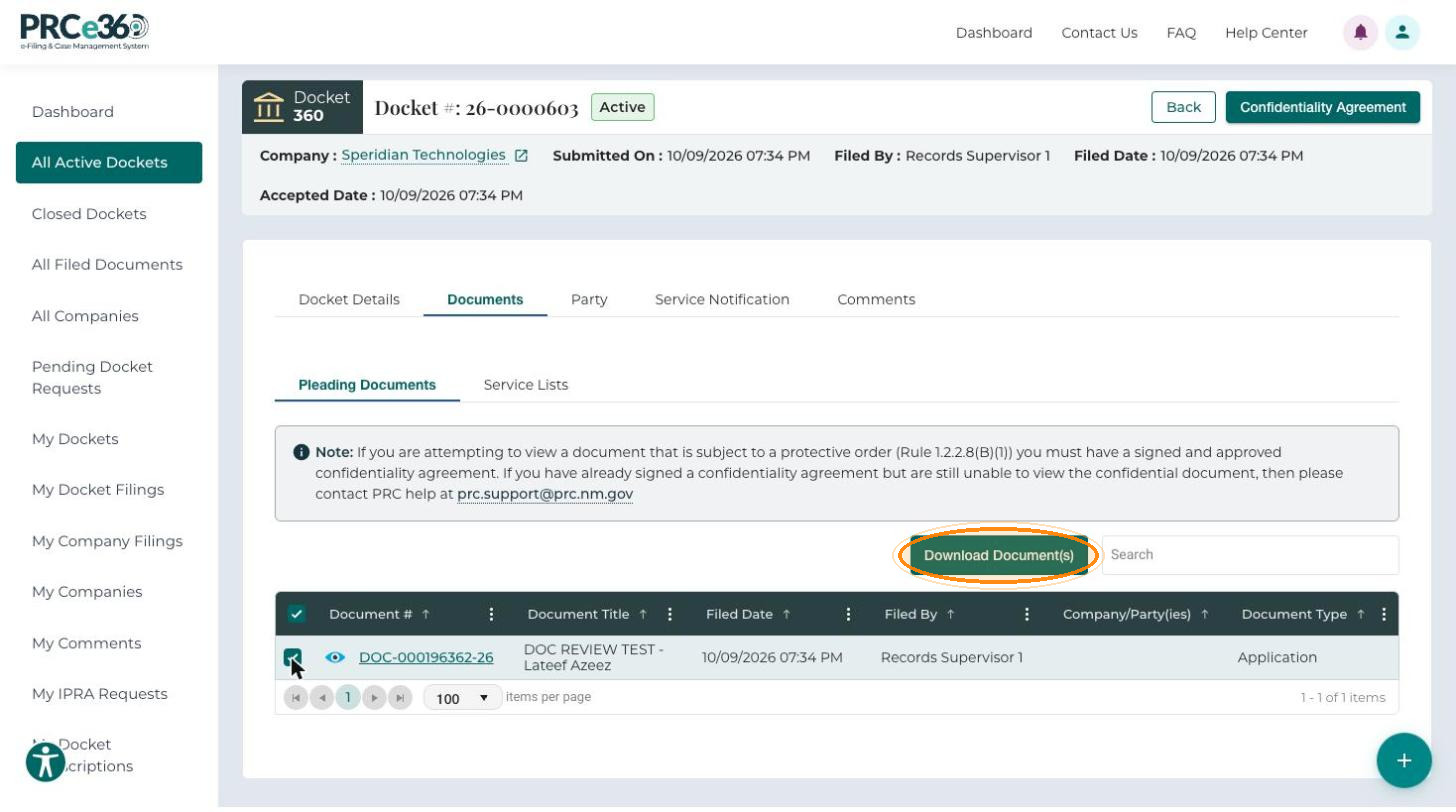
Click Download Document(s).
-
Under Select how you want to download the document(s), choose Individual or Zip.
-
Click Download.
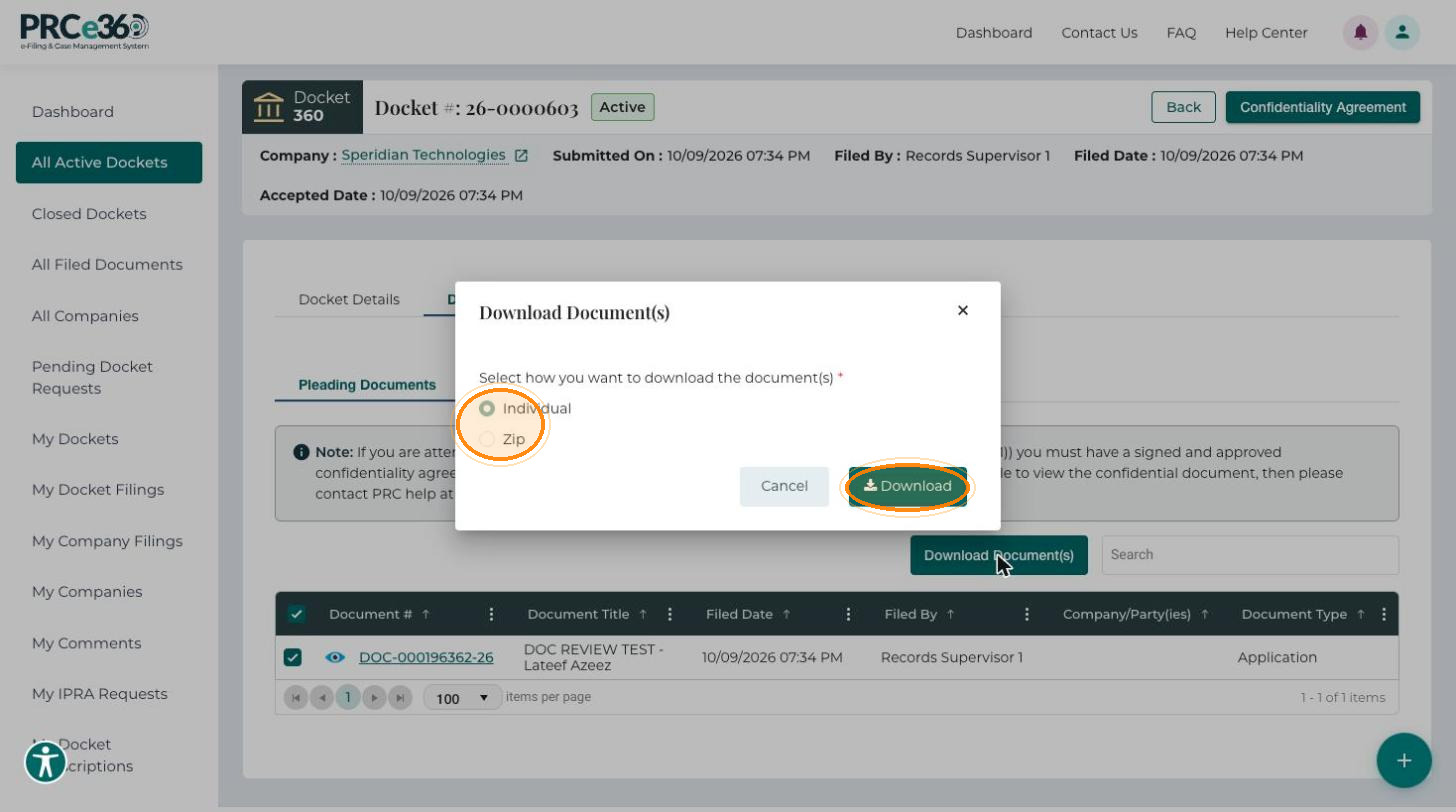
The selected documents download to your computer, one by one or as a single zip file.
Service Lists
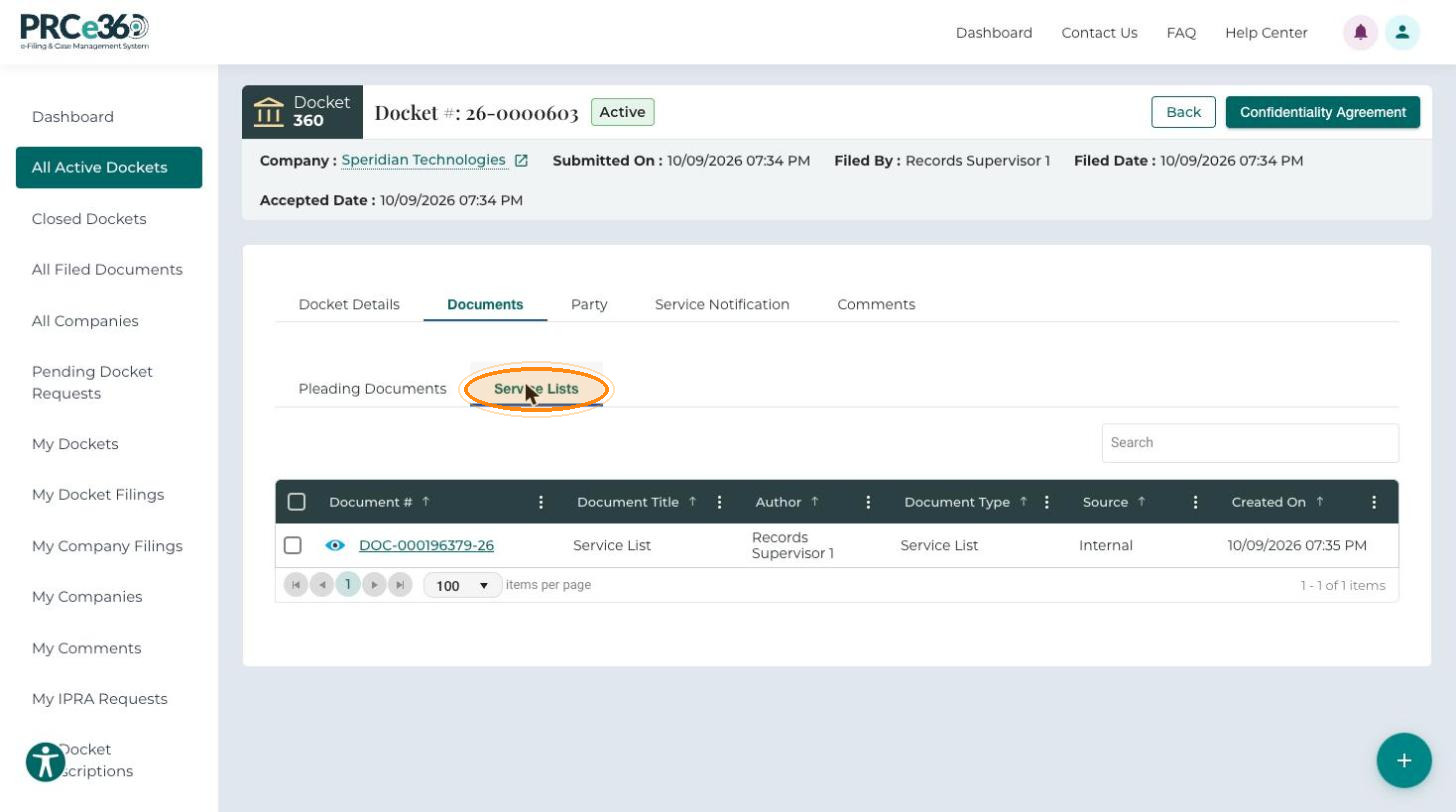
This sub-tab lists the service list documents for the docket. Click a Document # to open one.
- Document #
- Document Title
- Author
- Document Type
- Source
- Created On
Confidentiality Agreement
To get access to documents under a protective order, sign a confidentiality agreement for the docket.
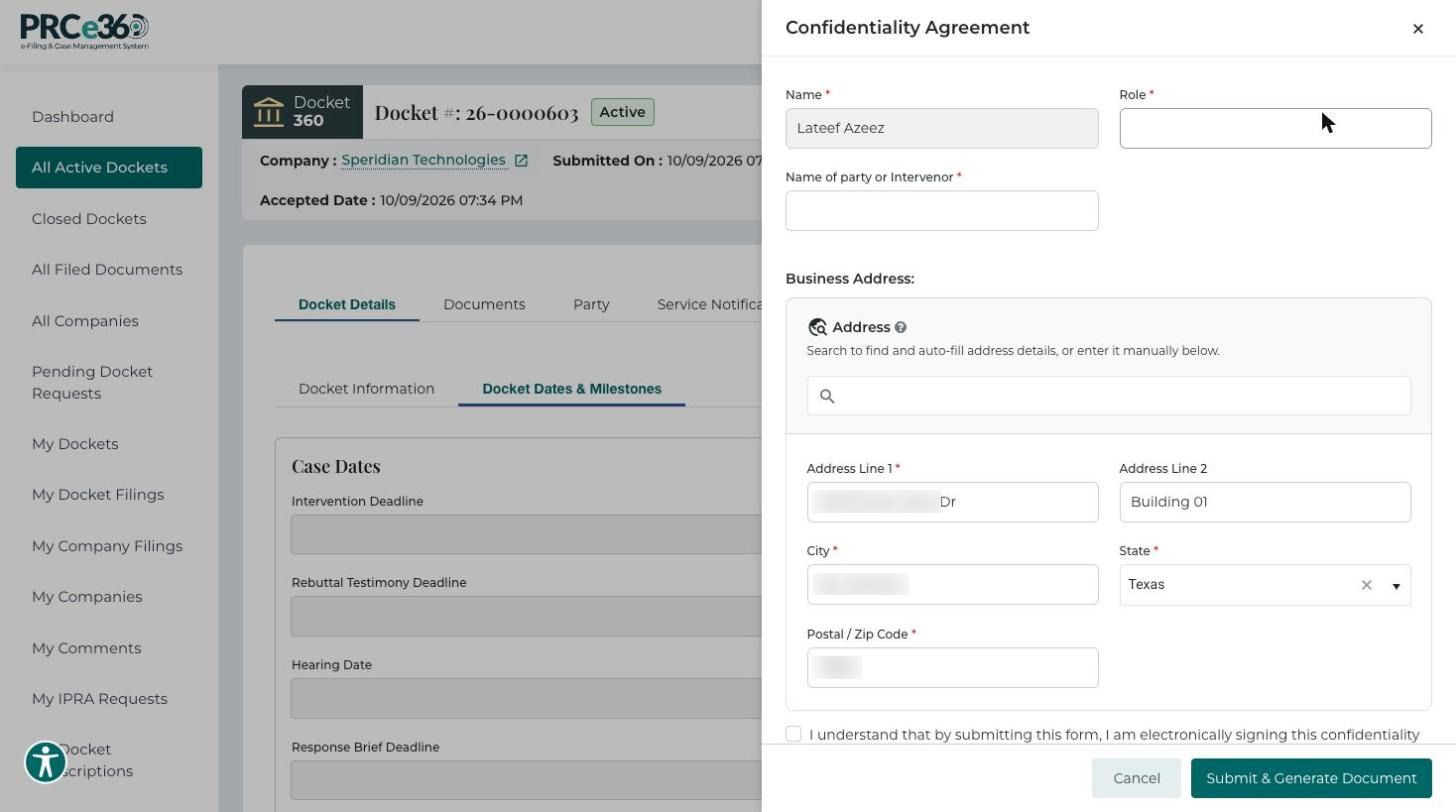
- In the Docket 360 header, click Confidentiality Agreement.
- Your Name is filled in. Enter your Role and the Name of party or Intervenor.
- Check the Business Address. Type in the Address search box to fill it in, or enter it yourself.
- Select the checkbox to confirm that by submitting the form you are electronically signing the agreement, and that you have read the protective order and agree to be bound by it.
- Click Submit & Generate Document.
Party Tab
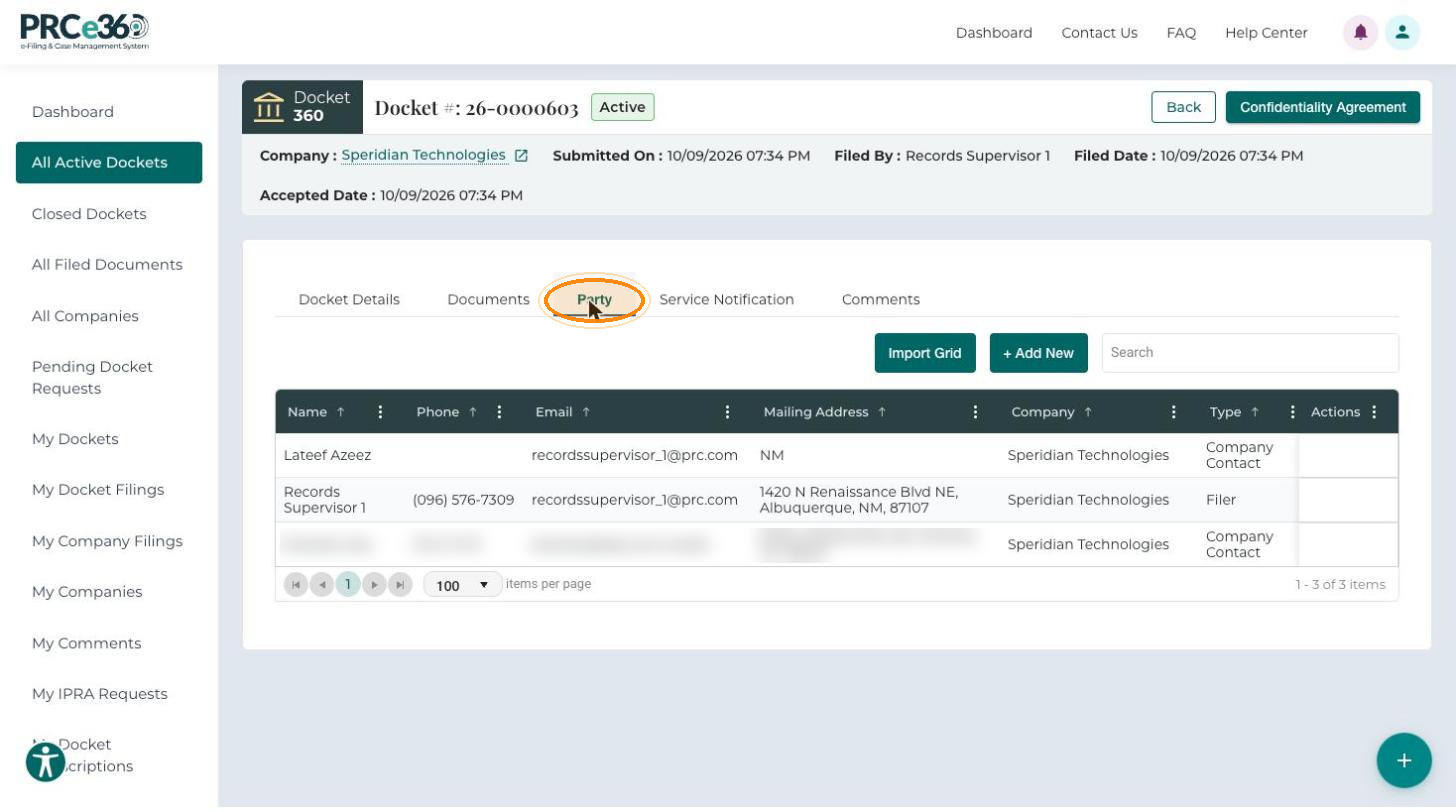
This tab lists everyone linked to the docket: parties added when the docket was created, parties added later, attorneys and company representatives. It gives one view of the primary parties (applicant, petitioner, respondent) and their contact details.
- Name
- Phone
- Mailing Address
- Company
- Type
- Actions
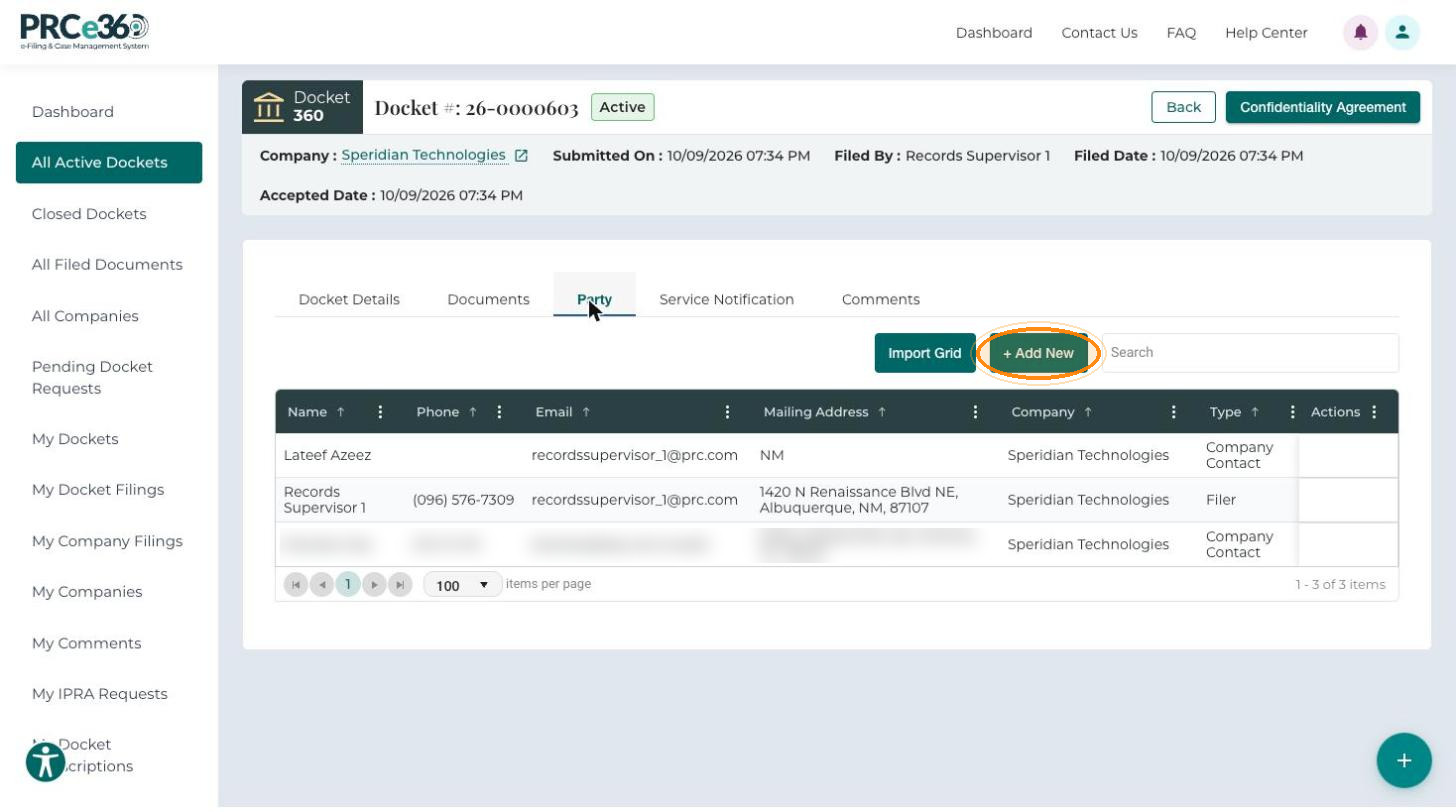
To add a party:
-
Click + Add New.
-
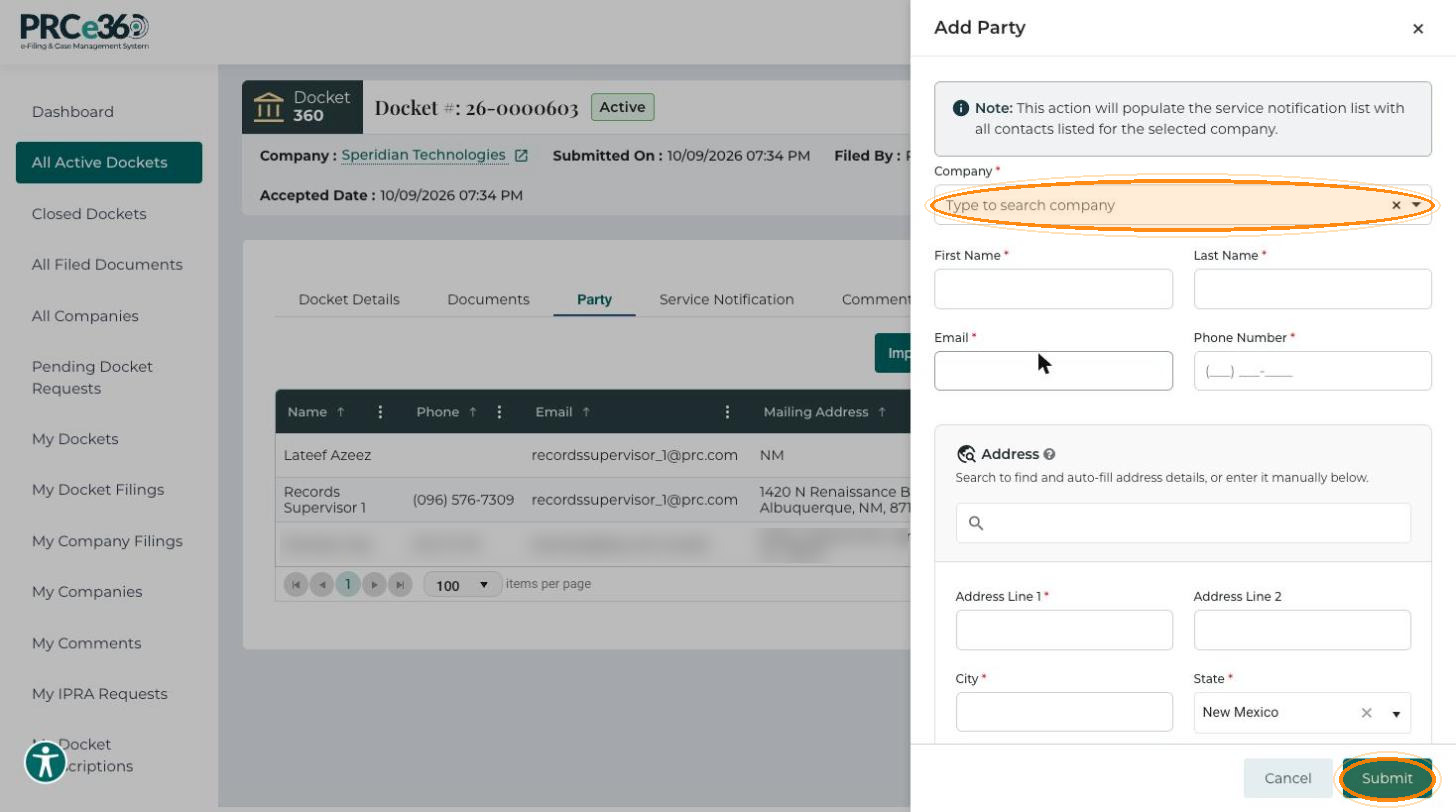
In the Add Party panel, choose the Company. All contacts listed for the selected company are added to the service notification list. Enter First Name, Last Name, Email, Phone Number and the address. Type in the Address search box to fill in the address, or enter Address Line 1, City, State and Postal / Zip Code yourself. Address Line 2 is optional.
-
Click Submit to add the party.
Service Notification Tab
This tab lists everyone who receives notifications for the docket: the primary filing party, additional parties, company contacts and contacts added by hand. Use it to see who will be notified, check mailing addresses and company links, and review each contact's notification status.
| Column | Description |
|---|---|
| Name | Full name of the recipient. |
| Phone | The recipient's phone number. |
| Where notifications are sent. | |
| Mailing Address | Physical or mailing address, loaded automatically or entered during filing. |
| Company | The company the recipient belongs to, if any. |
| Public User | Whether the recipient has a Public Portal account (Yes or No). |
| Type | The recipient's role, for example Filer or Company Contact. |
| Actions | Options for the recipient. |
The tab notes that four fields are required for each contact: First Name, Last Name, Type (Individual or Company) and Email.
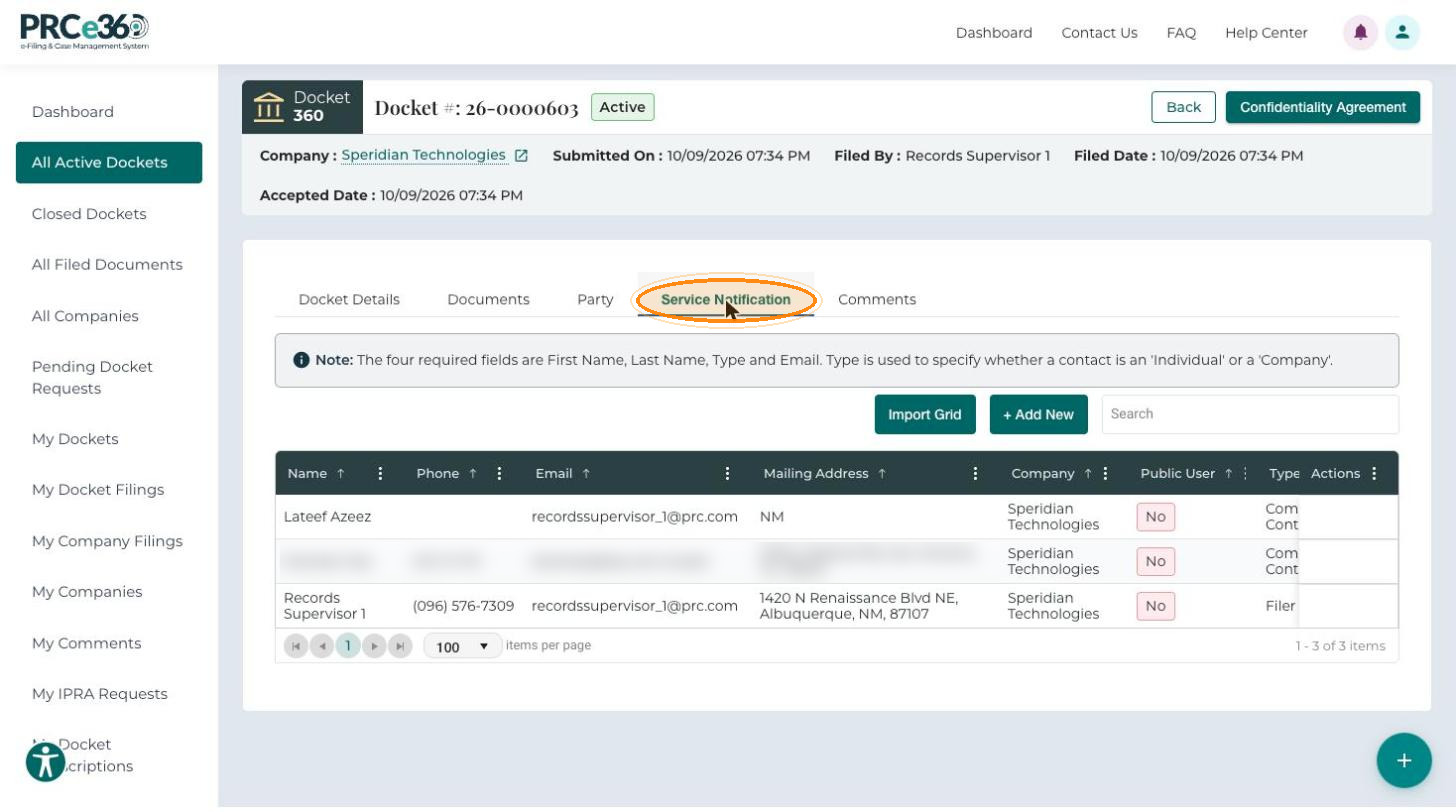
To add many recipients at once from a template, use Import Grid on a draft docket. See Bulk-Upload Service Notification.
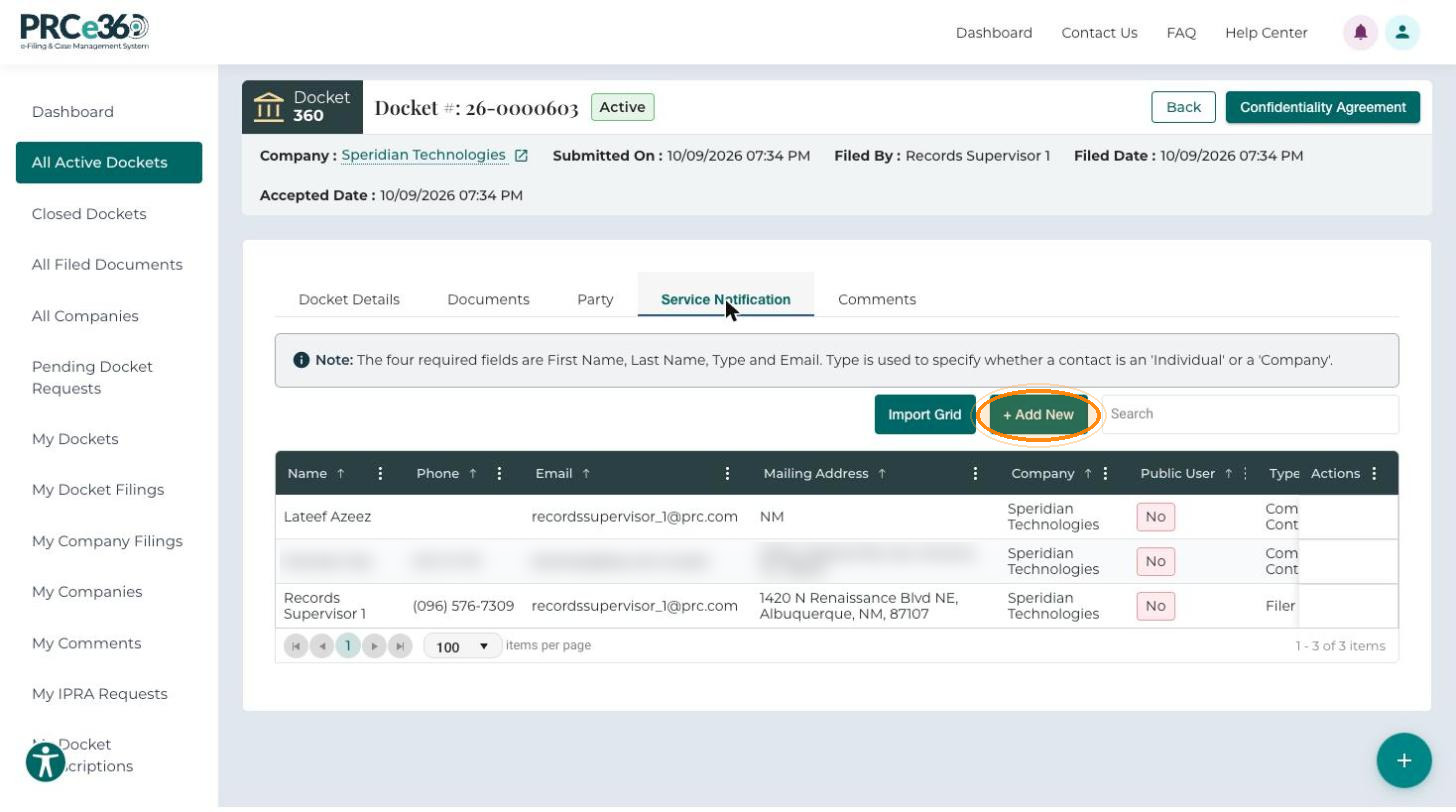
To add a recipient:
-
Click + Add New.
-
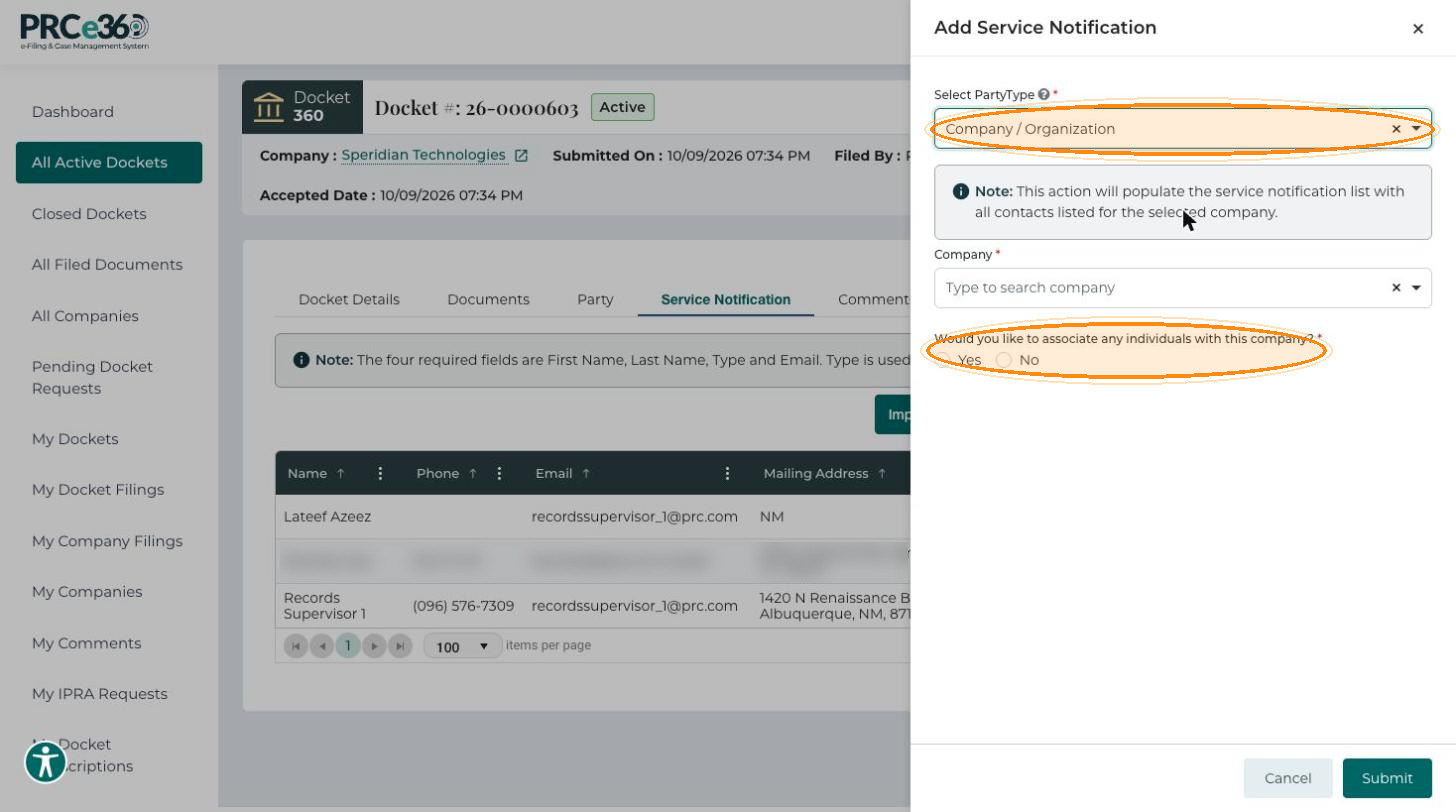
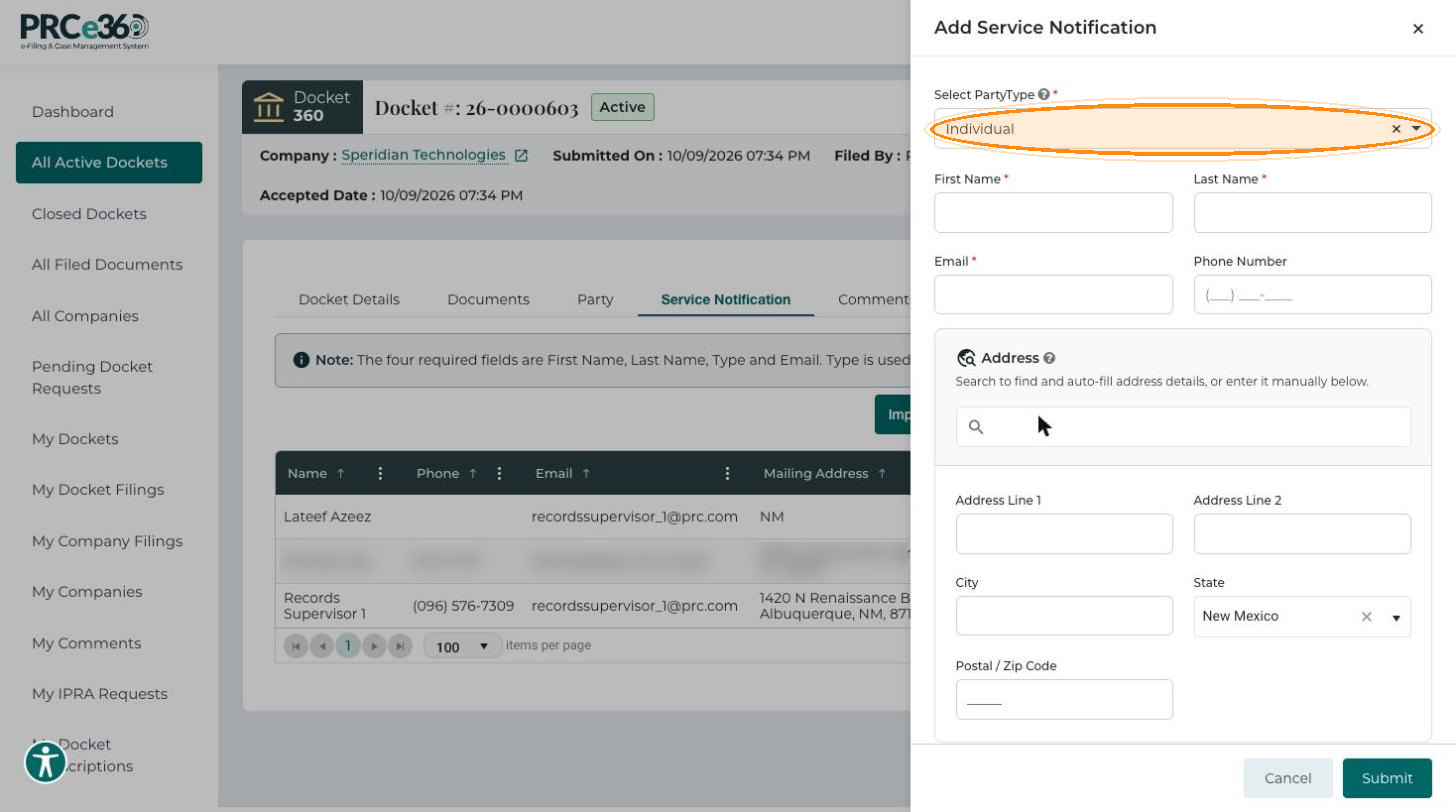
In the Add Service Notification panel, choose Select PartyType:
- Company / Organization – choose the Company and answer Would you like to associate any individuals with this company? All contacts listed for the company are added to the service notification list.
- Individual – enter First Name, Last Name and Email. Phone Number and the address are optional.
-
Click Submit to save.
Comments Tab
This tab lists the comments submitted to the docket, such as public comments and rulemaking comments, so you can follow comment activity on the docket.
- Confirmation #
- Comment Type
- Submitted On
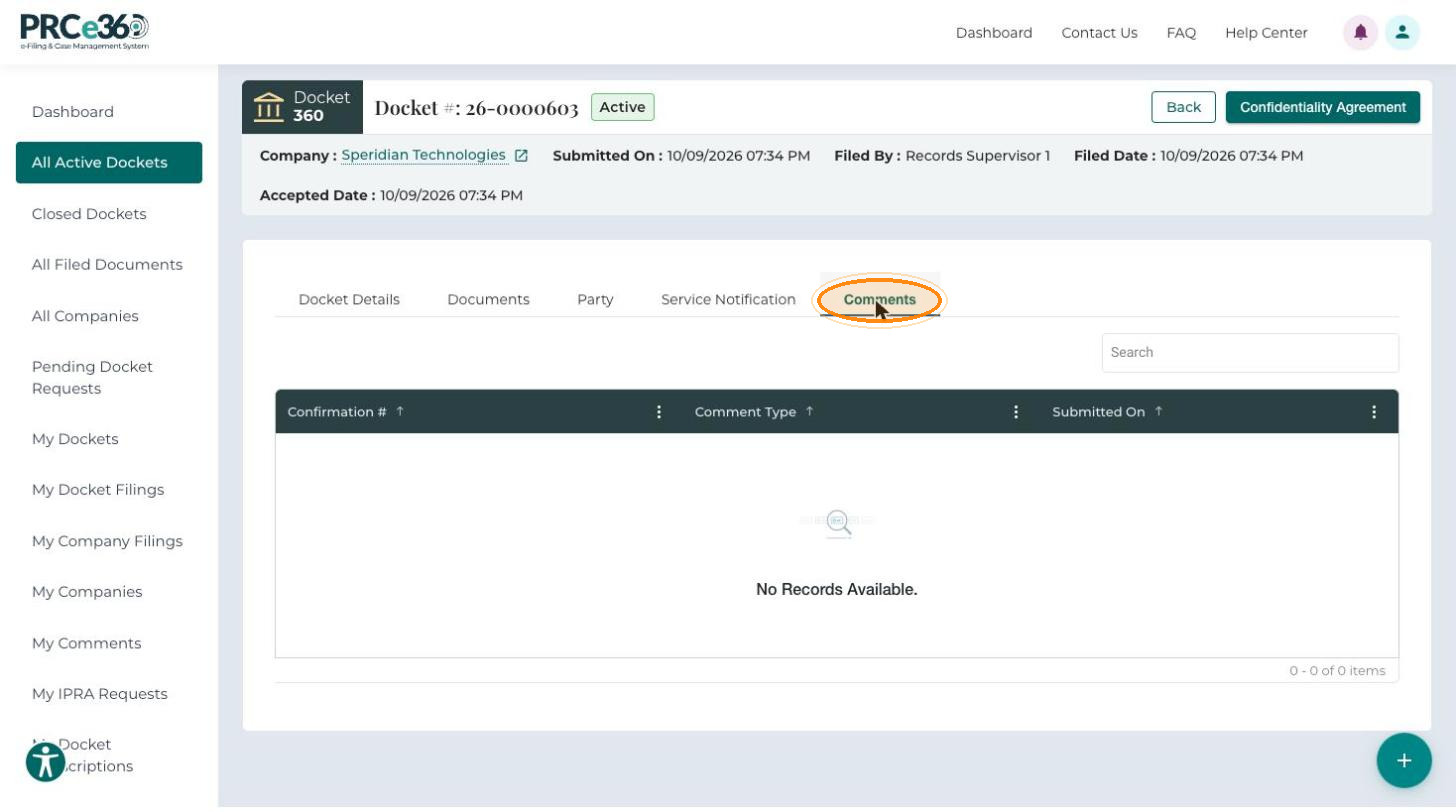
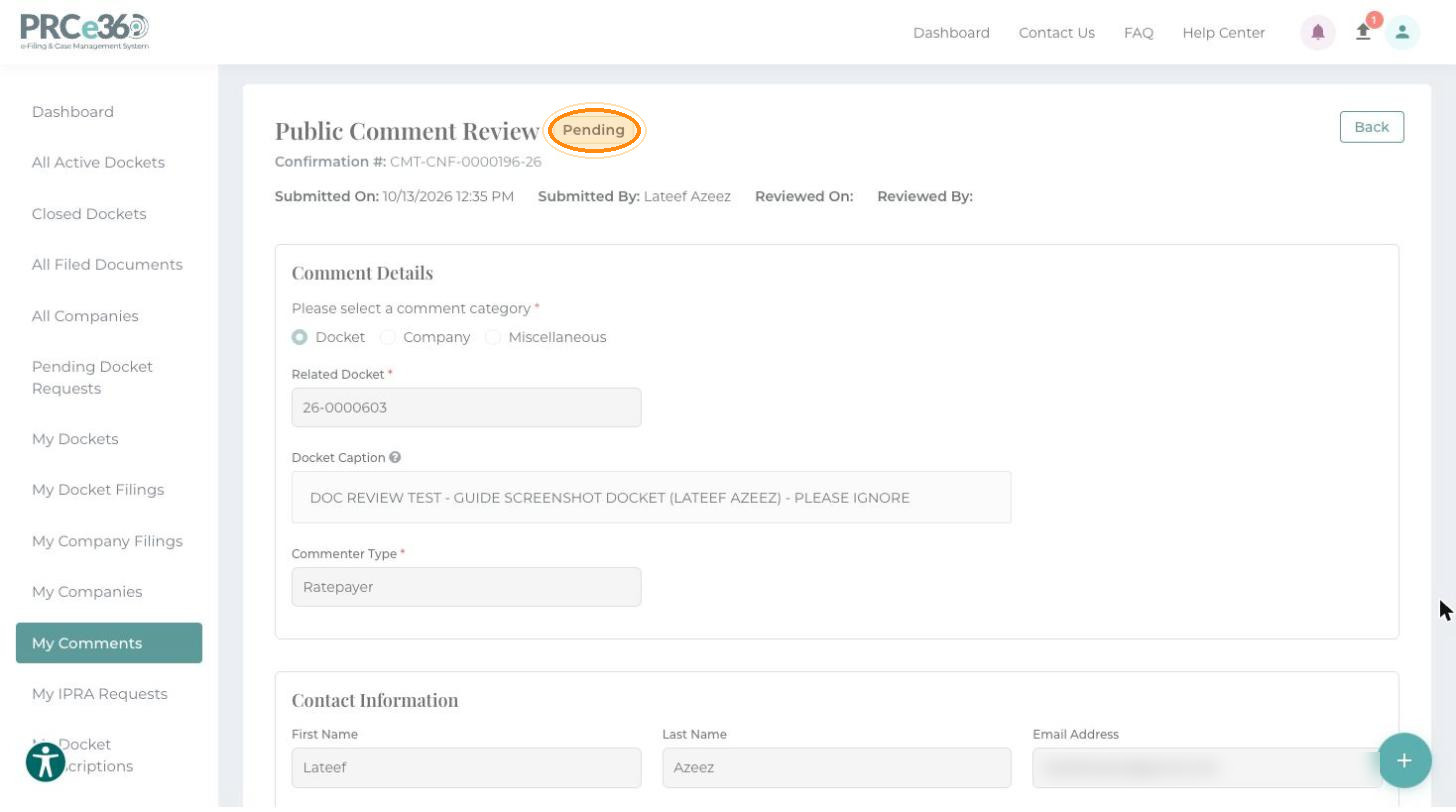
Click a Confirmation # to open the comment's Public Comment Review page. It shows the comment's status (for example Accepted, Pending or In Review), Submitted On, Submitted By, Reviewed On and Reviewed By, followed by the Comment Details, Contact Information and the attachments.